Introduction:
Adjusting column widths and row heights manually can be time-consuming and tedious. That’s where column and row autofit come to the rescue! These handy features automatically adjust the width of columns and the height of rows to fit the content perfectly, saving you time and ensuring your spreadsheets look polished.
Understanding Column Autofit:
Column autofit in Excel automatically adjusts the width of a column to accommodate the widest content within that column. This ensures that all data in the column is fully visible without any truncation or clipping. Whether you’re dealing with text, numbers, or dates, column autofit ensures that your data remains legible and easy to interpret.
Methods of Applying Column Autofit:
Excel offers several methods for applying column autofit:
Double-Click Method:
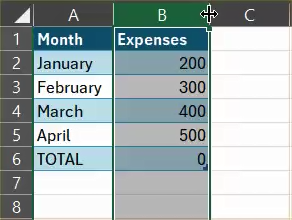
Simply double-click the right boundary of the column header (the line between two column headers) to automatically adjust the column width to fit the widest content in that column.

Home Tab Method:
Navigate to the “Home” tab on the Excel ribbon, locate the “Cells” group, and click on the “Format” dropdown menu. From there, select “AutoFit Column Width” to apply autofit to the selected column(s).

Understanding Row Autofit:
Row autofit works similarly to column autofit but adjusts the height of rows instead of the width of columns. It automatically adjusts the row height to fit the tallest content within that row, ensuring that all data remains visible and readable.
Methods of Applying Row Autofit:
Excel provides several methods for applying row autofit:
Double-Click Method:
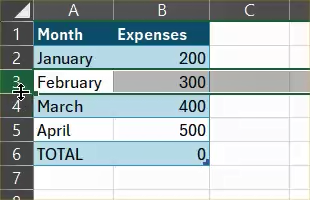
Double-click the bottom boundary of the row header (the line between two row headers) to automatically adjust the row height to fit the tallest content in that row.

Home Tab Method:
Navigate to the “Home” tab, locate the “Cells” group, and click on the “Format” dropdown menu. From there, select “AutoFit Row Height” to apply autofit to the selected row(s).
